This article describes a way to make sure the placement of negatives above your scanner’s platen is within the depth of field of your scanner’s lens for best sharpness.
If your film holders don’t place the film where the scanner focuses its lens, then you’re going to get fuzzy images. And that may be causing you to pull your hair out. Neither are good situations to find yourself in.
Now, let’s talk about checking the focus of your scanner.
Many flatbed scanners have a fixed focal distance set by the manufacturer, and they provide holders that place the negative “precisely” at that distance. Most of the time, this works well.
But there are times when you might suspect that the fixed focus (or even auto focus) isn’t behaving right. If you are getting consistently blurry scans or scans that you believe should be sharp and aren’t, you may have a scanner that isn’t focusing precisely, or a holder that isn’t placing the negative where the lens is focusing.
In this short article, I’ll show you an easy way to verify the depth of field on your flatbed scanner’s lens. Then, you can take steps to make sure your negative carrier places negatives precisely at the optimum distance above the scanner platen for maximum sharpness and resolution.
To verify the focusing capability of your flatbed scanner, all you’ll need is a transparent ruler and a second ruler to measure with.
I’ll be using the Epson V700/V800 for this instruction, but the procedures should work for any flatbed scanner.
Concept
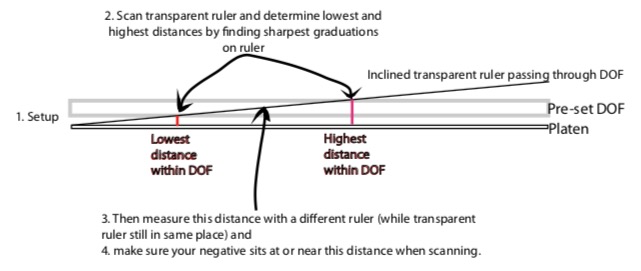
Like any lens, your scanner’s lens has a range of acceptable focus, or depth of field (DOF) where it performs best. You can determine DOF by scanning a transparent ruler that has been placed on an incline, with one end well below the minimum DOF height and the other end placed well above the maximum DOF height. The graduations on the scanned image of the transparent ruler will be sharp within the scanner’s DOF.
Procedure
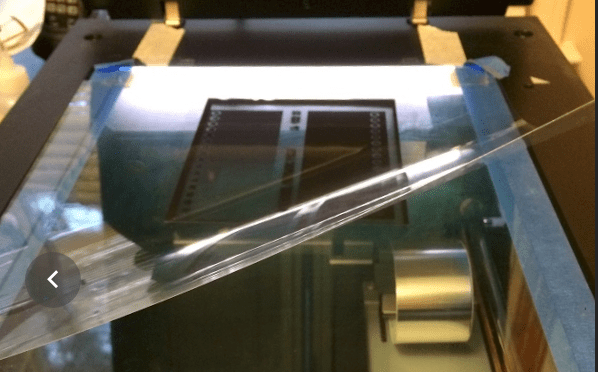
- The first step is to place the transparent ruler on an incline relative to the scanner platen. In the following picture, I placed one end of the ruler on the platen and placed the other end of the ruler to rest on the top of the scanner bed, shimmed by approximately 1/4″. Shimming the elevated end of the ruler will steepen the incline and help differentiate the sharpness along the entire length of the ruler. It’s important to check that when you lower the lid on the scanner that you don’t move or warp the ruler. You don’t need to lower the lid all the way; just close it enough to avoid touching the end of the ruler. Now, open the lid and tape each end of the ruler down to avoid movement during scanning.
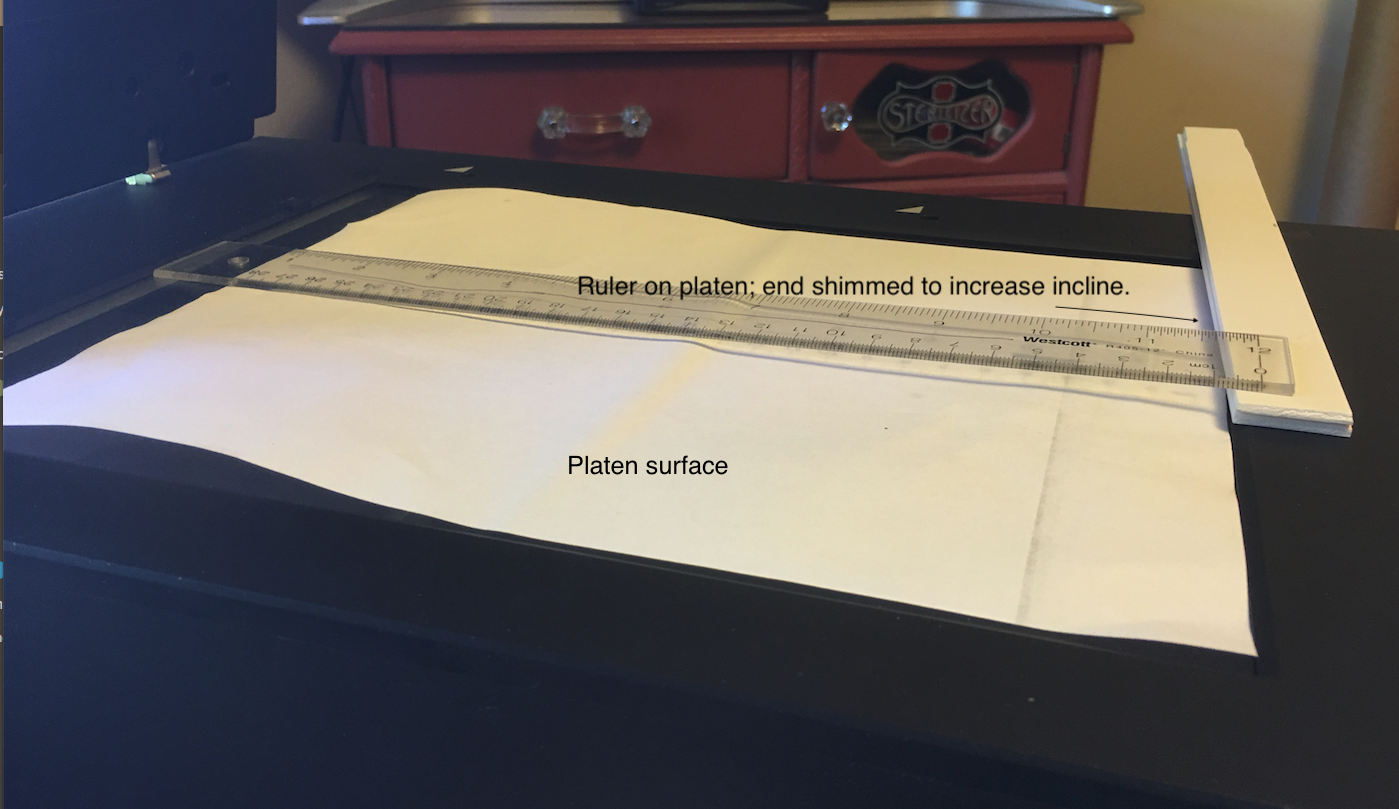
Shows the inclined placement of the transparent ruler on the V700 platen. The upper end is shimmed to increase the steepness of the incline. The white sheet of paper is only for illustration purposes so you can ‘see’ the scanner’s glass platen in this illustration (it’s not used during the actual scan).
- Scan the ruler using your normal scanning settings (i.e., high resolution, 2400 ppi) without sharpening, and open the file in your photo viewing software, like Preview, Photoshop, or Lightroom. Do not move the transparent ruler yet; you’ll need it in exactly the same location in Step 4.
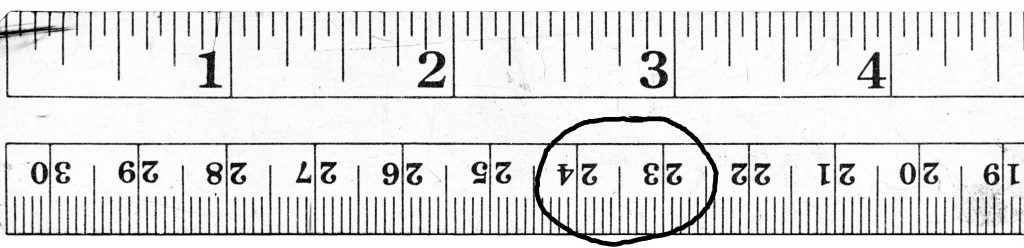
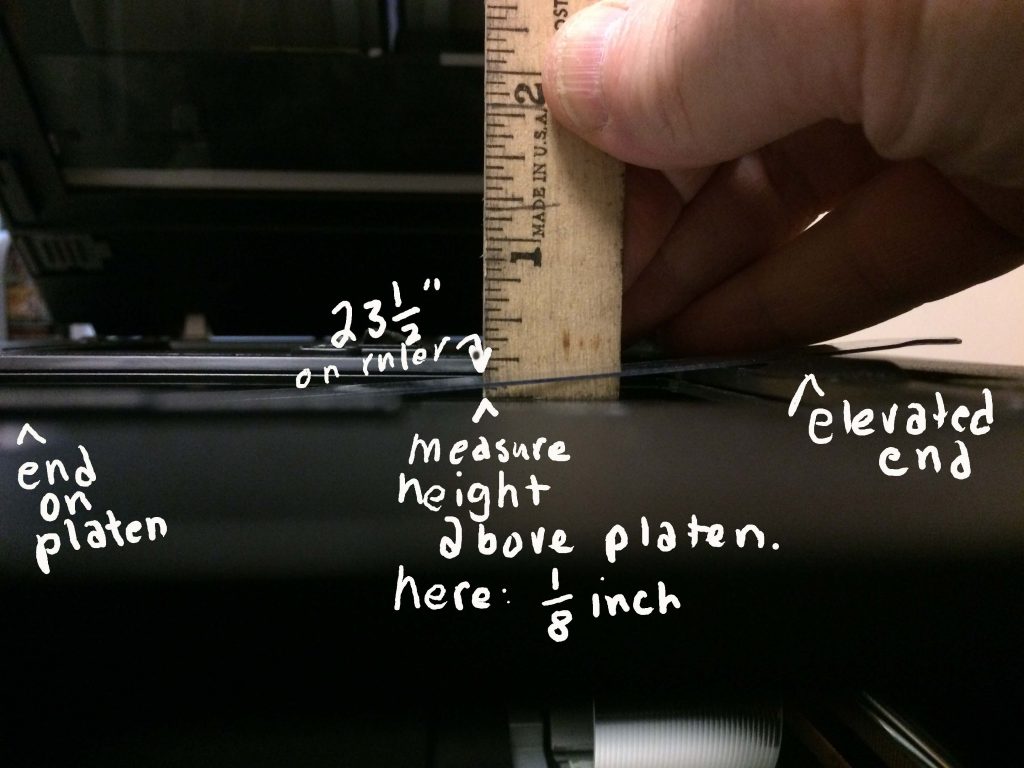
- On the scanned image, examine the ruler along its entire length, looking for the sharpest delineation of the numbers on the ruler. There should be a range of numbers/graduations that will be sharper than anywhere else along the ruler. If your scanner’s depth of field is very wide, you may not see any difference in sharpness along the ruler. This is good, because it means you shouldn’t be experiencing out of focus situation no matter where the negative is placed above the platen. But you need to examine closely to rule out minor differences in sharpness as you examine along the length of the ruler. In my example below, maximum sharpness was seen about 23-24 cm on the ruler, call it 23.5 cm. The differences in sharpness between 0 and 4 inches on this image is difficult to show, but careful inspection at 50% in Preview clearly shows the difference. You should see a clear difference.
- Now you need to determine the distance above the platen where you found the sharpest graduations on the ruler. Use a different ruler for this step. A micrometer may also be used if you have one, but you don’t need that much precision. I used a simple wooden ruler that began graduations at the very end of the ruler. So, at the point on the transparent ruler (still resting on the scanner) where I found maximum resolution, I measured the distance above the platen surface and found it to be 1/8″. Your results may vary. This measurement told me that my scanner’s best performance was 1/8″ above the platen.
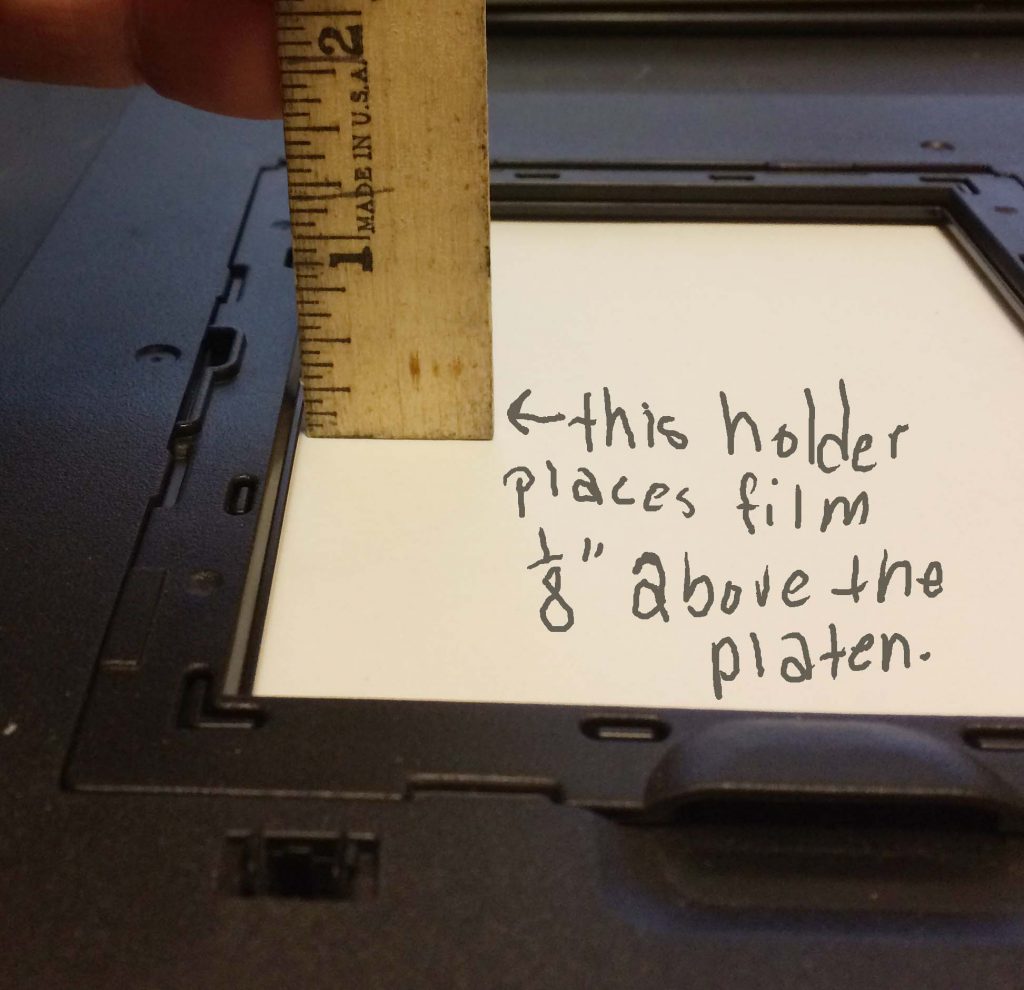
- Now compare this distance to the height of the negative plane on your negative holder to see if your holder is placing the negative where the scanner has its maximum resolution. First place your negative holder on a flat hard surface (e.g. a table top) and find the lip on the holder that holds the negative during scanning. Measure the distance from the table top to the top of the lip. This tells you exactly where your holder is placing the negative during scanning.
-
Interpretation
If you’re lucky, the height measured in Step 5 is exactly the same as the height measured in Step 4. It means your holder is placing the negative exactly where the scanner lens is focusing.
If the holder doesn’t place the negative within an acceptable distance for the scanner’s lens, you’ll need to modify your holder or change to a holder that does. The Epson holder comes with adjusting feet; merely changing the setting on the feet may fix the problem.
For the vast majority of scanners, the distance you find is sharpest will be very close to the distance measured on the negative carrier. But this quick test of focus on your scanner should at least confirm that scanner focusing is or is not optimal, and you can take actions to fix it.
It’s possible that after doing this test, you find that there is no region of perfect sharpness along the entire length of the transparent ruler. There are two possible reasons: 1. the ruler moved or deflected during the scan when the lid is closed (re-read Step 1 in Procedures above), or the scanner’s lens is faulty and you may need to replace or repair the scanner.
Bonus utility: I used this test to determine where my custom negative carrier had to sit for maximum sharpness. I modified my scanner to accommodate a wet-mount under-mount design, and knowing my scanner’s specific DOF told me how much shimming I had to do for correct placement of the negative in this custom carrier. We’re not constrained to using the manufacturer’s film carriers once we know the scanner’s true DOF.
What does it mean when the negative is placed optimally, but the scans still appear ‘fuzzy?’
First, make sure your shooting technique is perfect. Barring the case where the scanner is not functioning properly, finding that your images still appear unsharp most likely suggests a fault in technique. BY FAR, this will be the cause of unsharp images (i.e., not the scanner). It’s been the same since the the advent of modern cameras and lenses; it’s not the tools but the technique that causes most situations of unsharp images. You already know this, right? Do you use a tripod when sharpness is important to the image? Do you practice appropriate aperture/shutter speed relative to subject motion? Technique remains one of the most important factors in acquiring an image on the negative that is sharp or not sharp. It’s always been that way.
Second, make sure to minimize your subjective bias toward those hyper-acute images shot with modern digital cameras. I suspect this bias is a leading cause for people new to film thinking their scans are ‘blurry.’ This topic is probably worth a separate article; because it took me a couple years after returning to film scanning after a year shooting with digital to realize that comparing the two technologies is an apples and oranges comparison. In short, never compare a 1:1 depiction of a digital image to a 1:1 depiction of a scanned image unless the two images are exactly the same resolution (i.e., 20 MP to 20 MP), and even that is a stretch. The best evaluation of sharpness for a film scan is by looking at an appropriately sized print, not a file on your computer monitor. Don’t toss your scanner or give up on shooting film before making a print comparison!
I hope this article helps you determine whether your scanner is functioning properly, and how to determine where the optimum focal point of your scanner’s lens is. Feel free to ask questions.
Let me hear your questions or comments below.